I was going to talk about what we might possibly plant outside this week, but Mother Nature had different plans. Seeing as it started snowing again, I opted to ask what you would like to know and save the former idea for next week.
The consensus was garlic and composting.
So, this week garlic, and next week I’ll talk about composting.
You may not like what you are going to hear if you were super excited to try and plant garlic this year. Sorry!
So, there are a couple of ways to plant garlic, and I will share two of those methods with you that yield amazing garlic.
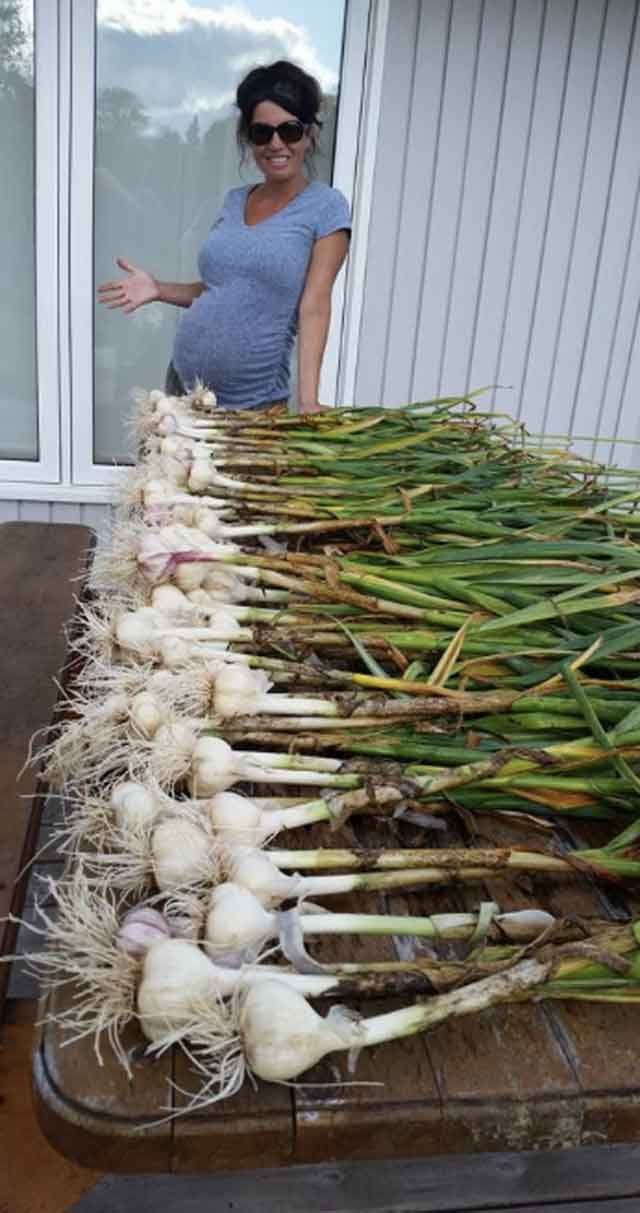 Now, I have many cool pics with lots of amazing garlic, but I have always loved this picture from almost 5 years ago when I was 8.5 months pregnant.
I can assure you that our garlic has been consistently this awesome.
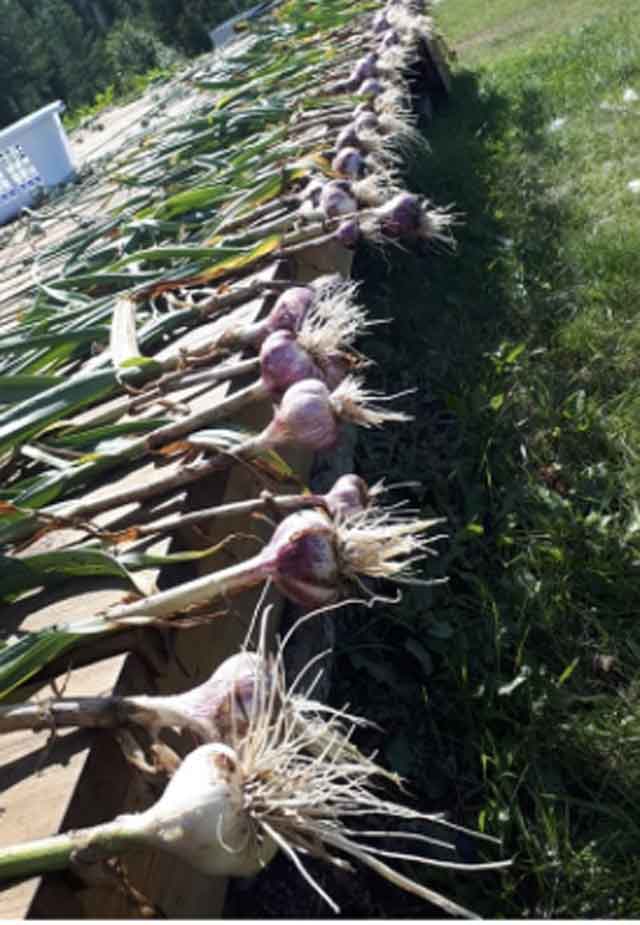
The picture of the giant garlic in my hand is from last year.
Pretty amazing, eh?
First: Planting garlic from seed. (2-year process)
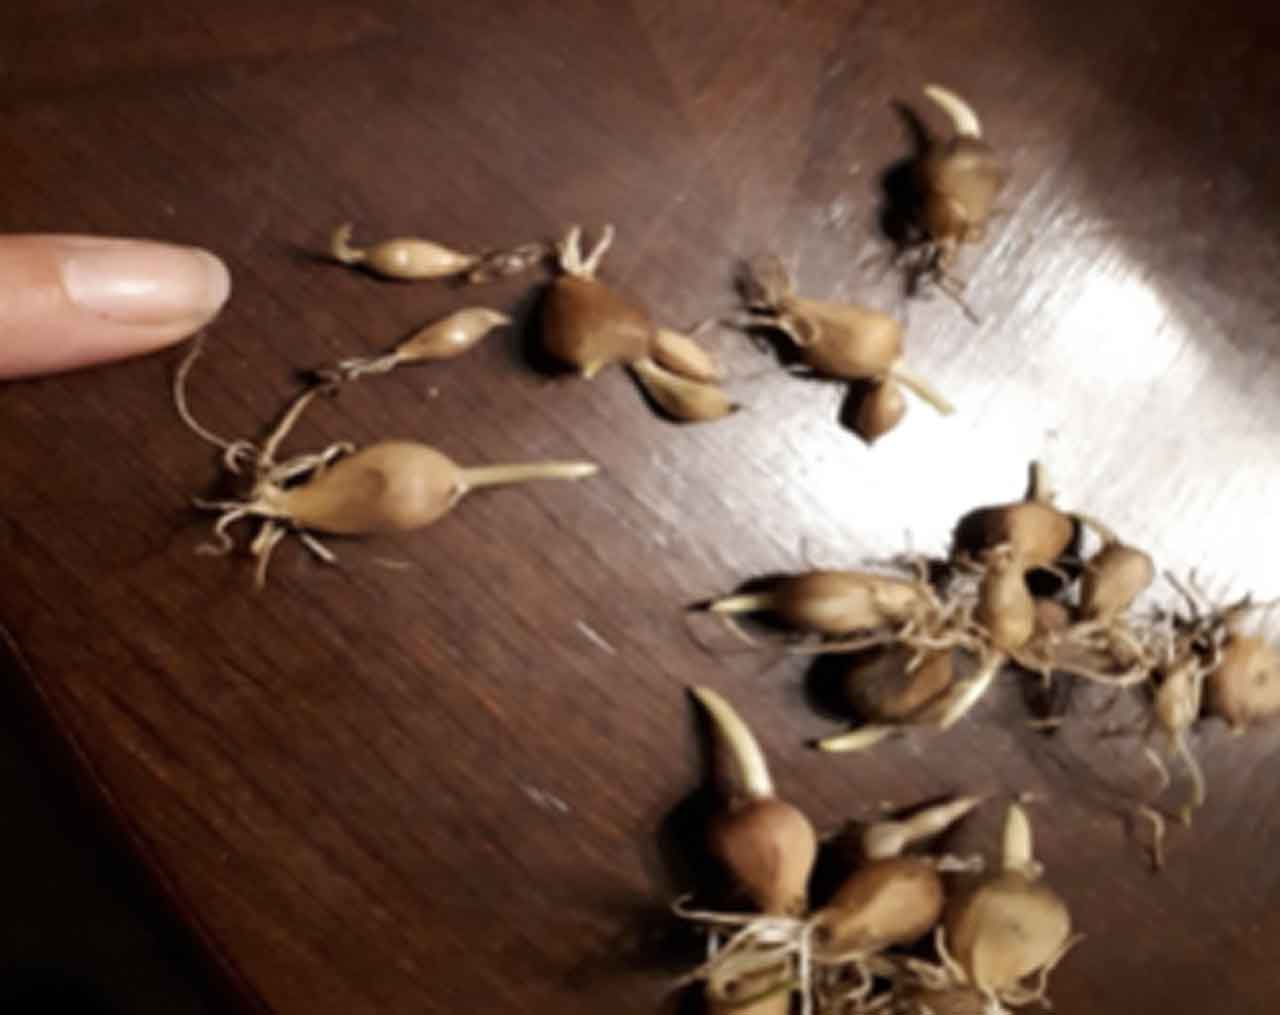
When a garlic plant hits mid-growth, it shoots up this really cool, long, hard, coiled stem up the middle. It slowly uncoils as it grows, and grows a bulb at the top that matures into seeds. Some varieties grow large seeds, while others grow smaller seeds. This picture has a couple of sizes. They can get bigger than that too.
 You can plant these in the spring. I actually pre-start them in the greenhouse about 3-6 weeks before the last frost. They will often start sprouting on their own — as the ones in this photo have — so that is when you plant them in small pots if starting early.
Transplant them into your garden around the last frost. When you move them into their permanent homes, be sure to add a good boost under each transplant. I add compost, Epsom salts, bone meal and blood meal under each transplant. Plant them in a location that you will NOT have to touch as they will need to stay put for 2 years! Planting from seed requires 2 years of growth. A big consideration for rotating your crops.
You will want to mulch them in the fall with about 4-6 inches of cover and uncover them in the spring. You will know they are ready to harvest (in the 2nd year) when the bottom 3 leaves die off. Then it is time to harvest, clean them up, dry them in the sun for a few days or couple weeks until the skin hardens, cut off the stems, and then store in a cool dark location.
 Second: Planting from a bulb (1-year process)
You can also take a garlic bulb, section it and plant each individual garlic piece. The picture shows an individual piece or section of garlic. This is a one year process. Note I said 1 year and not one summer. To get a really good harvest, garlic is something that you should plant in the fall before the ground starts to freeze; usually late September or early October.
Create a long row, add lots of yummy stuff for them to eat such as compost, bone meal, blood meal and Epsom salts. Bury them about 2-3 inches below the soil. The bulbs will start to generate roots and then go dormant for the winter. You will need to heavily mulch the garlic patch before the snow falls with about 4-6 inches of leaves, dead grass, straw… whatever… to protect it.
In the spring, uncover the patch once all the snow is gone and it’s not getting super cold at night (not just the snow on the patch.. I mean ALL the snow is gone everywhere). I usually wait until at least mid to late May to uncover mine. The plants will wake up quickly and start shooting up. Sometimes when you uncover them, you will find they already started growing. They are frost tolerant, so don’t worry about that.
As the garlic plant grows, it will get VERY tall, and shoot up a coil up the middle. The really cool thing about garlic plants is if you are not needing the seeds to replant, then you can cut those coiled stems as they are starting to uncoil and use them in place of garlic while you are waiting for the garlic! They are delicious and very garlicky.
As with the seed planting process, you will know they are ready to harvest when the bottom 3 leaves die off. Then it is time to pull them up, clean them up, dry them in the sun for a few days or a couple of weeks until the skin hardens, cut off the stems, and then store in a cool dark location. We like to save the best garlic bulbs from the harvest to replant for the next year. Garlic acclimatizes to its environment, so if you keep replanting your own seeds or bulbs, you will get amazing garlic in about 4-5 years.
Garlic Planting in the Spring (Seasonal process)
So, you can follow the same steps as planting the seedlings or bulbs in the spring, but you have to do it as soon as the soil is workable. Garlic does not take root well if the ground is too warm. You will get small garlic with ok taste. So, if you still want to try this spring, get your stuff ready as you will be getting them into the ground in May as soon as the soil is workable. Seedlings will still take 2 years, but the bulbs will produce some garlic with a spring plant. (This picture: A garlic patch as the coils are starting to straighten out.)
Well, thanks for joining me this week. Next week we will dive into composting, and the following week get ready to get dirty as planting starts for some veggies! Again, feel free to send me an email with questions to shyanne.leah@gmail.com. If you want to receive my blog as they come out, send me an email and I’ll add you to my blog list!
Happy Planting!
Shy-Anne